Easter is a beautiful holiday to gather with family as you reflect on your many blessings. Everything around you seems to scream that it is spring and Easter. There are flowers in bloom, warm rays of sun are beaming, fluffy white cumulus clouds that provide refreshing shade, birds and butterflies delightfully fluttering around, and then there are Easter eggs. Easter eggs can be so beautiful. Like the snowflakes of spring, you can create an Easter egg that is different from the rest. If you would like to dye Easter eggs with your children to celebrate this joyous season, then Taste of Home offers tips for dying eggs like a pro.
Use What You Have
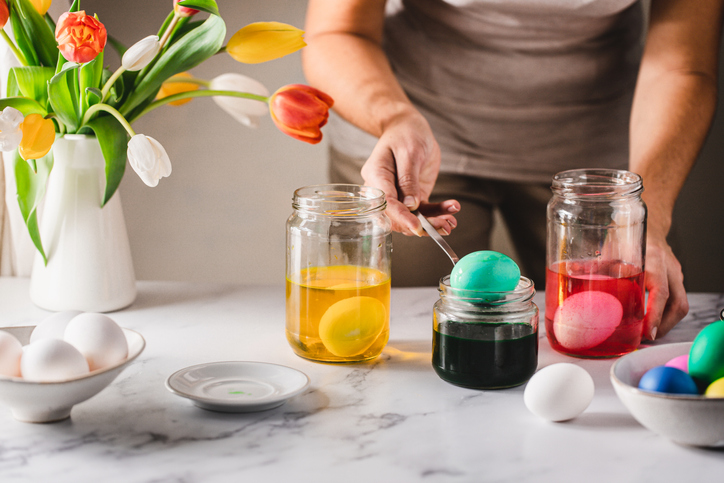
Year after year, people purchase Easter egg dying kits. Money is squandered on these kits each spring when you probably already have everything you need in your pantry, especially if enjoy decorating cakes. You really only need three things to decorate your eggs. You need food coloring, white vinegar, and clear glasses. If consider yourself a baker, then you probably already have several bottles of food coloring in your pantry. You can always go old school to make colors you do not have by mixing drops of different food coloring together. Any heat-safe container can work, but Taste of Home suggests using clear glasses, so that you can see the progress on your dyed eggs. Also, it is essential that you only use white vinegar for dying your eggs. Substituting any other type of vinegar can mess up your crafts.
Boiling Eggs
Before you can begin coloring your eggs, the first thing that you need to do is to hard boil them. Once your water comes to a boil in a large pot, you will boil the number of eggs you wish to dye. While there are egg timers to assist you in getting the perfect hard-boiled egg, you can get a quality hard-boiled egg if you boil your eggs for about 12 to 15 minutes. What is great about boiling and dying the eggs is that you will have a delicious protein-filled snack to have later after your kids have gone on their Easter egg hunt.
Directions for Dying Eggs
Dying eggs is pretty straightforward. You will need to place about half a cup of boiling water in each of the glasses. From there you will add a teaspoon of white vinegar to the water and the food coloring. You can add 10 to 20 drops of the color you want into the glass. Note that the more drops you add will give the eggs a deeper hue. When it comes time to dye the eggs themselves, you will want to use a utensil to save your fingers from getting stained. You can opt for a wire egg holder, but a whisk will work just as well. All you have to do is open the whisk’s wires to place the egg inside. Plunge the egg and whisk into the coloring of your choice. You can let the egg sit in the glass anywhere from five to ten minutes. Time also plays a part into the outcome on the appearance of your dyed egg.
You might also like: Get Your Tickets To See Brett Young
Finishing Up with Your Dyed Eggs
When you are done dying your eggs, you will need to let them dry on a paper towel before putting them back into the egg carton. From there, you can let your kids enjoy an Easter egg hunt on Easter morning as you hide your beautiful dyed Easter eggs.
If you are looking for something else beautiful to enjoy this spring, then come shop the selection at Berglund Cars. There are a variety of vehicles to test drive on a bright, pretty day. Come visit Berglund Automotive Group in Roanoke today!
Disclaimer: The stock image is being used for illustrative purposes only, and it is not a direct representation of the business, recipe, or activity listed. Any person depicted in the stock image is a model.